Beating Shoulder and Elbow Pain!

Do you suffer from shoulder pain or a diagnosed shoulder condition such as rotator cuff impingement?
Do you spend hours every day on your laptop / computer or phone?
Do you suffer from elbow pain / RSI?
Do you suffer from upper back and neck pain?
Think of it this way!
This may sound slightly insane initially, but if you sit at a desk all day think about going to work as being an athlete! You perform repetitive tasks placing a large, unnatural volume of stress on certain areas of your body – much like an athlete. To combat this it’s crucial to have adequate strength in your shoulder, back, neck, and elbows to enable you to tolerate the repetitive load placed upon them.
How pain occurs
You can have a pain-free body that functions properly, even in our modern world. However, you drive to work, sit at a desk all day performing repetitive work, a quick break to check your phone, before you head home to sit on the sofa scrolling through your phone or laptop where another day has passed and everything you have done is working against how your body should function.
No wonder why we all have back, neck, and shoulder problems, right!?
So, you will have to be regularly stretching, mobilising, and strengthening your body – you have to commit a reasonable about of time to have a healthy body!
It’s well known that many upper back, neck, shoulder, and elbow problems occur from alignment issues, so actually, the root of your problem possibly isn’t a “shoulder or elbow issue”. You really have an alignment / postural issue as a result of your working life – the shoulder and elbow can often just be where the problems or symptoms occur. However, regardless of where the underlying issue is, the shoulder now needs help.
We have given you some quick and simple posture advice at the end of this guide.
In terms of this guide, we are looking closely at the shoulder which due to a combination of instability, weakness, poor alignment, and poor range of motion can present with various and often chronic conditions. Therefore, this guide focuses on strengthening your shoulder, upper back, and arm to try and address common problems, reduce pain and improve function.
For virtually all of us have a few things are going on – in no particular order!
- You’re sat at your desk all day in a comprised posture doing repetitive work.
- You had an old shoulder injury that never quite repaired properly.
- A shoulder or elbow problem seemingly came out of nowhere, no injury as such but perhaps a small insignificant movement or a busy day at work triggered your problem.
- You do a manual job the involves constant stress on your shoulders.
- You currently have a chronic problem and you are under the care of your GP, Physiotherapist, or Osteopath.
- You play a sport or do a hobby that involves your shoulder being potentially overused i.e. tennis, squash, badminton, cricket, swimming, regular gym work, play a musical instrument, or regularly do a craft such as painting or knitting etc.
- Yes, age does play a role, but not so much in a numerical way (you can have strong, functional shoulders as you age!) but just in a “you’ve had longer for problems to occur” type way!
Remember these two things. You don’t necessarily need to know the finer working of the shoulder but these are the principles to understand initially!
- You need adequate strength to tolerate the loads being placed through your shoulder and elbow. It’s absolutely crucial for women to build strength as by nature you usually have less muscle mass and muscular strength than men.
- You need adequate Range of Motion (ROM) for the shoulder to be able to function properly.
If you had these 2 things you would reduce your risk of shoulder and elbow problems by probably 90%, if not more.
Where do I start?
The starting point is being posture aware and understanding the Anatomical Position (pictured below and the posture position is at the bottom of this guide).
During gym-based exercise, your starting position should generally be the Anatomical Position. This is the position where the body appears to be at its strongest so you’re able to generate more force and you’re optimally aligned so your risk of injury is reduced.
We should also use a combination of the Anatomical Position and regular stretching and mobilisation when we are at work – see our Desk Stretches here!
I find this fascinating as one reason why pain or dysfunction may occur.
If just one joint is out of alignment or not functioning correctly, or muscles are losing optimal range of motion or strength then it has a potential knock-on effect to all other structures around the body. For example, shoulder dysfunction or stiffness can result in elbow problems.
So, pain can occur anywhere when ANY joint or muscle has lost alignment, range of motion, or strength. See, X is not always the spot. As we have mentioned above, a shoulder problem can often be traced back to a spine or back alignment issue. For example, you are sat at a desk all day and you have noticed your shoulders have gradually started to become rounded and recently you have been experiencing shoulder pain in certain positions. Here the potential problem is the impaired alignment of the back and spine affecting function and optimal movement of the shoulder – the shoulder is just where the problem presents.
Which, brings us back to posture, alignment, and the Anatomical Position. Just to remind you, restriction in movement and inadequate strength are the underlying causes or major contributors of virtually EVERY muscular-skeletal problem. It’s why we all suffer from back, neck, and shoulder pain. Simply, we aren’t functioning in an optimal position, with optimal strength and optimal range of motion to tolerate the load of the repetitive nature of our jobs.
- Now, look in the mirror or take some photos and compare your posture to the ideal posture in the Anatomical Position.
- Of course, none of us are ever going to have picture-perfect posture. In fact, we are all different shapes and sizes so one size never fits all. But, most of us could improve hugely!
- And, you don’t even need to go to the gym to work on all this!
This guide isn’t going to solve all your problems. But, it will build strength in your shoulders, upper back, and arms which will be a big step towards a reduction in pain and an improvement in the function of your shoulder and elbows..good news, huh?!
By now, you will realise the real solution is to regularly exercise to maintain strength, range of motion (ROM), and good alignment. Corrective exercises can easily be integrated into your current exercise routine. An example would be performing the External Shoulder Rotation exercise in this guide before doing your main workout.
Here is a quick simple way to improve your posture!
This will naturally draw your shoulders back, activate your glutes, align your neck and activate your core. This is a great way to correct your posture!
1: Standing; squeeze your bum cheeks (glutes) together as hard as you can.
2: Draw your belly button towards your spine
3: Pull your Scapulae (shoulder blades) down and then slightly together.
4: Align your neck so it’s over your rib cage, not projected forward.
You can do this throughout your day. Of course, if you’re sitting all day squeezing your bum cheeks won’t be possible but you can still perform steps 2-4.
However, if sitting all day you don’t need to try and hold this posture constantly – that would be exhausting! Stand up every 30 minutes to stretch and move. And, yes you will find yourself slouching at times – that is normal if you are sat for 8 hours a day!
However, when exercising practice holding this position throughout all the exercises in this guide…we’ve reminded you on pretty much every exercise:-)
Now, those two simple postural changes doesn’t mean everything is fixed but it is a great starting point. Your long-term goal is to build strength so you naturally “hold” that anatomical position.
Did you just try it?! It works, right!
Use the 3 Different Grips (shown below)
These different grips of the band will strengthen your shoulder in slightly different angles while also adding variety to your routines. The grips can be implemented to virtually any of the exercises described.
You’ll be stronger in some grips than others, that’s okay and normal depending on which muscles are most dominant in that particular movement. Just vary the grips and angles at different workouts.
Another reason to vary the grips and angles is to ensure you don’t repetitively load the same muscles, joints, and tendons over and over – this is likely one of the reasons you suffer from pain in the first place!
And as, you now know, the body is not made to tolerate repetitive loads on a regular basis…unless sufficient strength and a ROM is present to tolerate those loads but even then it may still struggle!
Similar to running. For example, if there is insufficient strength and ROM in your ankle then the potential for problems not just in the ankle but up the entire chain is huge so it comes back to having the strength and ROM to tolerate the load.
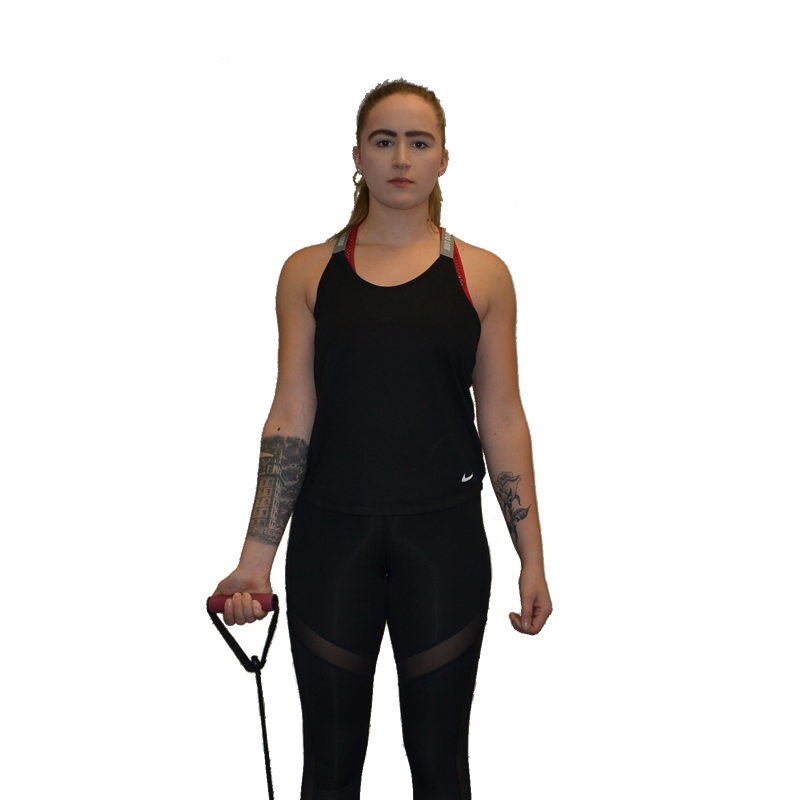
Under Hand Grip
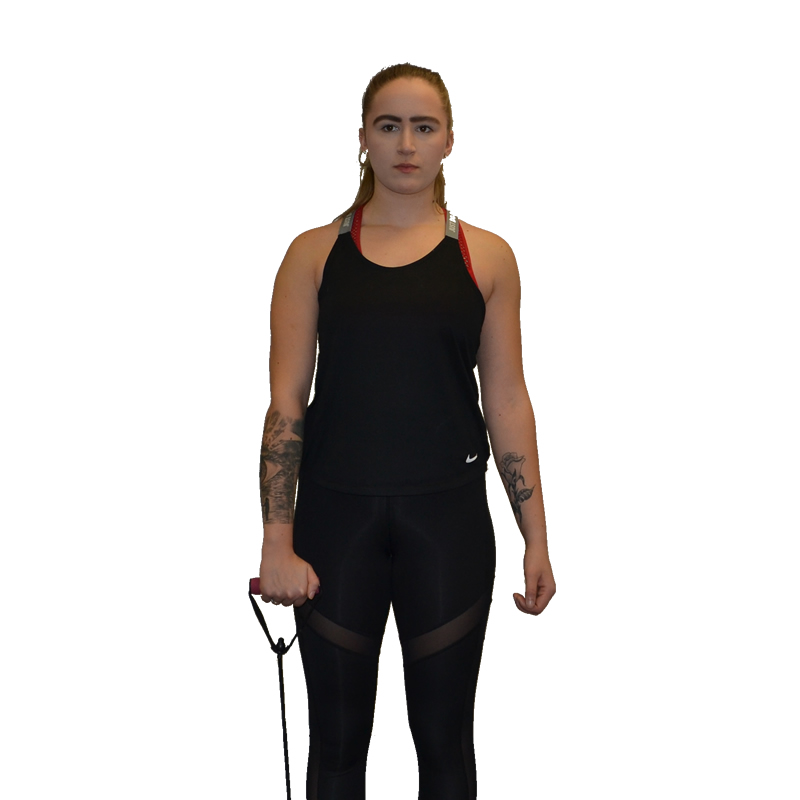
Over Hand Grip
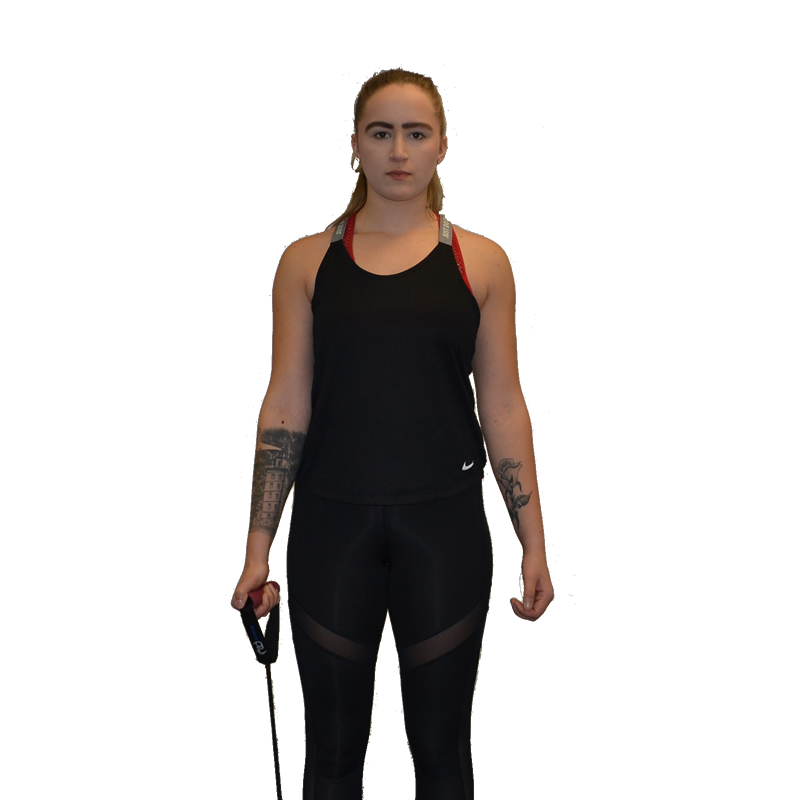
Hammer Grip
THE EXERCISES
This exercise focuses on a key rotator cuff muscle of the shoulder and, therefore, is one of my favourite exercises for shoulder function. Purely because we spend most of our days doing the complete opposite to this exercise i.e in a posture with our shoulders rounded and pulled forward! This exercise fights back against that classic laptop, phone, computer posture and builds strength in those ever so important rotator cuff muscles.
During this exercise, it is key to ensure you work a full range of motion and perform in a good anatomical position. Most of you will find this exercise challenging – thats okay! It should result in a “nice” aching / fatigued feeling in your shoulder if performed correctly – not pain.
If you only manage to do one exercise each week, then this is the one to do! I would advise doing it 2-3 times per week. Doing this exercise properly and regularly should see good improvements in the function of your shoulder.
Muscles worked: Infraspinatus, Teres Minor, Posterior Deltoid
Position of band: Wrapped around door handle
Band grip: Side / hammer grip
Rep Speed: 2:2 (2 econds each way)
Rest: Other arm rests while other arm works
Alternatives: Not many just do this one!
Teaching Points:
- Stand side on to the door, with the working hand / shoulder furthest from the door
- Band wrapped around a door handle, non-working hand holding the other end of the band creating resistance
- Keep elbow close to body (avoid elbow flaring out too much)
- Rotate shoulder and arm as far away from the body as you can
- Keep wrist alignment (avoid wrist “turning out” to increase range of motion)
- 2 seconds each way, slowly return band back to starting position
- On return movement, your hand does not need to go much further than your belly button
- Remember optimal posture
Suggested Beginner Workout:
1 -2 sets of 10 reps
Suggested Intermediate Workout:
2 – 3 sets of 12 reps
Suggested Advanced Workout:
3 set of 12 – 15 reps
This is the opposite of the External Shoulder Rotation exercise but performed in a similar way. However, instead of rotating outwards, you rotate inwards across the stomach.
You will probably be stronger in this position but your aim should be for a similar balance in strength to the External Shoulder Rotation exercise.
With that in mind, we would recommend you perform this exercise 1:2 compared to the Shoulder External Rotation. This means, if you do 1 set of this Shoulder Internal Rotation exercise then you should do 2 sets of the Shoulder External Rotation exercise.
Muscles worked: Teres Major, Subscapularis, Pectorailis Major, Latissimus Dorsi, Anterior Deltoid.
Position of band: Wrapped around door handle
Band grip: Side / hammer grip
Rep Speed: 2:2
Rest: Other arm rests while other arm works
Teaching Points:
- Stand side on to the door, with the working hand / shoulder closest to the door
- Band wrapped around a door handle, non-working hand holding band creating resistance
- Keep elbow close to body (avoid elbow flaring out too much)
- Rotate shoulder and hand inward towards your belly button
- Maintain wrist alignment (avoid wrist “turning in” to increase range of motion)
- 2 seconds each way
- On return movement, your hand does not need to pass much further than your hip
- Maintain optimal posture throughout
Suggested Beginner Workout
1 -2 sets of 10 reps
Suggested Intermediate & Advanced Workout
2 – 3 sets of 12 – 15 reps
The One Arm Row exercise is another great exercise and fantastic for strengthening those super important muscles at the rear of your shoulder and between the shoulder blades (scapula). With most women I see, these muscles are particularly weak and therefore a key area to strengthen.
This exercise can work from any height and any of the grip positions, although you may find the palm facing up position a little uncomfortable depending on your range of motion in your wrist, elbow, and shoulder.
Muscles worked: Rear deltoids (shoulder). Rhomboids and Mid Trapezius (between the scapulae)
Position of band: Wrapped around door handle but can be from above or below the door frame.
Band grip: Start with side / hammer grip
Rep Speed: 2:2:2 this means 2 seconds row, 2 seconds hold and squeeze in row position, 2 seconds return
Rest: Other arm rests while other arm works
Variations: Use overhand or underhand grip. Band position can be changed to either a high or low position. The band can also be rowed into narrow, medium, or wide positions. You can also perform this at the gym with cables or on the seated row machine.
Teaching Points:
- Stand facing door
- Row your arm back toward you. Keep your shoulder blades squeezed together and pulled down – avoid your shoulder hunching up
- When performing the row parallel to a door handle your shoulder and elbow should be almost parallel. Wrist should be straight and parallel to elbow
- When rowing from a higher point your elbow will naturally “sit” lower than your wrist
- And, when rowing from a lower vantage point your elbow will naturally be higher than your wrist
- Keep wrist straight at all times
- Maintain a slow controlled speed and pause and squeeze when you have rowed back as far as you can
- Maintain anatomical position throughout
Key points:
Avoid shoulders raising up to a hunched positioned by pulling shoulder blades down and together continuously throughout the exercise.
Suggested Beginner Work Out:
2 – 3 sets of 10 reps
Suggested Intermediate Work Out:
2 – 3 sets of 15 reps
Suggested Advance Work Out:
2 – 3 x 6 reps on each grip continuously (24 reps total for each set)
2 – 3 sets
All too often women tell me they have no arm strength or “my arms are just feeble!” Well duh! You have to do something to build up the strength otherwise they will just be, erm, feeble!
The bicep curl is a simple, classic exercise to start strengthen your bicep (front of the arm). Now, if you go to the gym then doing things like assisted chin-ups or pull-ups would be a great exercise for building back, shoulder, and arm strength but as a starting point and something safe and simple to do at home this perfect.
Muscles worked: Bicep
Position of band: Band held under foot to create tension
Band grip: Underhand
Rep Speed: 2:2
Rest: Other arm rests while other arm works
Variations: Use hammer / side grip
Teaching Points:
- Band “held” under foot to create tension
- Bend elbow and curl palm to shoulder
- Keep elbow close to body, minimal / small movement in shoulder is okay
- Control band back to starting position
- 2 seconds up and 2 seconds down (2:2)
- Maintain optimal anatomical position
- Keep your shoulder blades squeezed together and pulled down –avoid your shoulder rounding or hunching up
Key points:
The downward part of the movement is key on this exercise so make sure it’s nice and controlled as you straightened your arm – adhere to the 2:2 rep speed!
Suggested Beginner Work Out:
2 sets of 10 reps
Suggested Intermediate Work Out:
2 – 3 sets of 12 reps
Suggested Advance Work Out:
3 sets of 15 reps
Enjoy!
This exercise works the back of the arm, the opposite to the Bicep Curl, and will start increasing the tone and shape in your tricep (the well-known Bingo wings!).
This is a simple and safe exercise to start strengthening your Tricep. It isolates the Tricep so, therefore, doesn’t put excessive pressure on the shoulder in the way something like a Tricep Dip at the gym might.
Muscles worked: Tricep
Position of band: Band wrapped around door handle.
Band grip: Hammer Grip
Rep Speed: 2:2
Rest: Other arm rests while other arm works
Variations: Overhand grip. Or attach the band higher, above head height, to create what is termed a “tricep push down”, essentially a very similar exercise performed the same way.
Teaching Points:
- Band wrapped around a down handle, non-working hand holding band creating tension.
- Bend over to approximately 45-degree angle facing the door, small split stance
- Working arm / elbow should start at 90 degrees
- Keep elbow close to body and “kick” elbow backward, shoulder shouldn’t move
- Control band back to starting position
- 2 seconds kick out and 2 seconds controlled back to starting position (2:2)
- Maintain spinal alignment, so make sure your back is NOT rounded as you bend over
Key points:
Maintain a neutral spine and ensure the movement back to the starting position is controlled.
Suggested Beginner Work Out:
2 sets of 10 reps
Suggested Intermediate Work Out:
2 – 3 sets of 12 reps
Suggested Advance Work Out:
3 sets of 15 reps
See you later bingo wings!
This exercise focuses on strengthening the muscles in your forearm which may reduce your risk of Repetitive injuries from such things as typing at work.
This is exercise is similar to a bicep curl but performed with an overhand grip.
Teaching Points:
- Band “held” under foot to create tension
- Palm should be facing the floor throughout
- Bend elbow and curl the top of your hand to shoulder
- Keep elbow close to body, minimal / small movement in shoulder is okay
- Keep wrist aligned with arm throughout
- Control band back to starting position
- 2 seconds up and 2 seconds down (2:2)
- Keep your shoulder blades squeezed together and pulled down –avoid your shoulder rounding or hunching up
Key points:
You won’t be as strong in this position as you would be with a traditional bicep curl. The downward part of the movement is key on this exercise so make sure it’s nice and controlled as you straightened your arm – adhere to the 2:2 rep speed!
Suggested Beginner Work Out:
2 sets of 10 reps
Suggested Intermediate Work Out:
2 – 3 sets of 12 reps
Suggested Advance Work Out:
3 sets of 15 reps
How to Set Yourself into Optimal Posture
By now, you will realise the real solution is to regularly exercise to maintain strength, range of motion (ROM), and good alignment. Corrective exercises can easily be integrated into your current exercise routine. An example would be performing the External Shoulder Rotation exercise in this guide before doing your main workout.
Here is a quick simple way to improve your posture!
This will naturally draw your shoulders back, activate your glutes, align your neck and activate your core. This is a great way to correct your posture!
1: Standing; squeeze your bum cheeks (glutes) together as hard as you can.
2: Draw your belly button towards your spine
3: Pull your Scapulae (shoulder blades) down and then slightly together.
4: Align your neck so it’s over your rib cage, not projected forward.
You can do this throughout your day. Of course, if you’re sitting all day squeezing your bum cheeks won’t be possible but you can still perform steps 2-4.
However, if sitting all day you don’t need to try and hold this posture constantly – that would be exhausting! Stand up every 30 minutes to stretch and move. And, yes you will find yourself slouching at times – that is normal if you are sat for 8 hours a day!
However, when exercising practice holding this position throughout all the exercises in this guide…we’ve reminded you on pretty much every exercise:-)
Now, those two simple postural changes doesn’t mean everything is fixed but it is a great starting point. Your long-term goal is to build strength so you naturally “hold” that anatomical position.
Did you just try it?! It works, right!
.
FAQ’S
As we mentioned in the videos and some of the text, what the shoulder has in range of motion it sacrifices slightly in strength and stability in certain positions. However, that doesn’t mean the shoulder is weak by nature. Sitting at your desk all day on your computer or laptop is probably the least functional thing you can do for your shoulder and elbow… well probably your body in general!
For most of us, working on a laptop or computer isn’t going anywhere soon but there is plenty you can do to improve things AND in a relatively short space of time.
The body in general hates repetition! It can adapt to most things but it just can’t tolerate repetitive stresses / loads well so you need to help it out a bit by doing simple strengthening exercises and range of motion exercises aka mobility exercises and stretching. However, in this guide, we are focusing on strengthening exercises more than the latter two of mobilisation and stretching.
We have started you with 6 / 7 simple strengthening exercises. However, there are countless exercises you could perform.
EVERY exercise in this guide you can perform at home, there is no need to go to the gym. You will however need to purchase an exercise band.
Many people I see for massage treatments have stiff / tense muscles in their upper back, neck, and shoulders but crucially they also have weakness. Neck pain can often be related to weakness in the back and shoulder muscles usually with accompanying range of motion impairment around the neck.
You can do as little as 15-20 minutes per week if you wish! But that really is the absolute minimum.
So, begin with twice a week several days apart to start building healthy habits and a new exercise routine.
Here’s a reminder of how the exercises may help…
- Improve the function of your shoulder by improving strength and range of motion
- Reduce pain
- Improve your posture
- Build a little lean, toned muscle – always a bonus!
Ideally, aim for 3 times of 15/20 minutes per week, particularly in the early weeks when you’re trying to build strength. Once your shoulders are in a good (or a better) place you might find doing them just once or twice a week as maintenance exercises enough.
Remember, it doesn’t have to be perfect but it does need a start point! Even if that is 2 minutes a day – it all DEFINITELY helps and will make a difference.
We couldn’t discuss pain management and or improvements in strength without touching on the core…you should be attempting to activate your core whilst doing all the exercises in this guide.
Your core needs to be working properly to help prevent injury. Briefly, your core is made of 3 layers: deep, middle, and outer units. All three should be trained regularly and in different ways – see our Core One Programme here.
It is well researched and documented that a weak or underactive core increases your risk of back pain, injury, and general dysfunction.
The starting point for your core is to initially work on your stabilising core muscles. A key stabiliser is a muscle called the Transverse Abdominis (TA). Once this muscle is activated, the muscles surrounding the TA will activate and begin to stabilise your core.
Yes. This guide has been designed to help those with chronic back, neck and shoulder problems or to prevent problems occurring.
No, these exercises are not to be done in the acute phase of injury, please speak to your GP or a physiotherapist. However, if you come home from work and your shoulders feel achy / sore then doing some of the exercises (gently 1- 2 sets) in this guide may really help.
Possibly. If your problem is chronic then some of these exercises may help. However, start very gently with the exercises, 1 – 2 sets of 5 reps of just one of the arm exercises will be enough to start with and then gradually build up the number of reps, sets and exercises. Always refer to your GP or Physiotherapist if you have any doubts or currently under their care
Yes & No. Yes, if they agree to them. No if you have not spoken to them first as some of these exercises may be contradicted for your particular problem or stage of rehabilitation.
Remember these exercise should not be done if you have an acute injury or currently under the care of your GP or Physiotherapist . If you have have a chronic problem with your upper back, shoulder or neck then start slowly with this exercises (see question 1). However, like any exercise you can “over do” these exercises too. Therefore, if you feel worse for doing these exercises give yourself a few days rest from the exercises to allow any irritation to calm down and then re start with 1 set of 1 exercise and assess reactions. Above all listen to your body and build slowly.
We appreciate that when people experience pain during exercise they fear they are doing some wrong or making things worse. You need to be sensible with any new exercise regime. Generally, you should be looking for a “nice!” aching / fatigue feeling during these exercises. It may feel like the muscle is “burning”. If you experience sharp pain during any of the exercises then you should cease doing the exercise and seek professional advice.
Hopefully! Building strength in your back, shoulders, and arms should allow them to “do their jobs properly” which in turn will take some of the pressure off your neck. Weakness in your upper back and shoulders can be a classic reason why you experience neck pain.
Yes / No. If you under the care of your GP or Physiotherapist then speak to them first. If it’s a chronic problem and you are no longer under the care of your GP or Physiotherapist but still having problems then yes, gently, starting these exercises may help.
This is dependent on various factors. However, we recommend doing these exercises 2 -3 times per week for between 15 and 20 minutes. If you are in pain with your shoulder, back, neck, or elbow then start slowly, 2-3 minutes per day, assess progress, and gradually build up.
Always start slowly if you have a chronic problem, choose 1 shoulder exercise and 1 arm exercise, do 1 set of 10 reps for each exercise and that will be enough the first time around. Gradually increase the volume over the next few weeks until you can do 2-3 sets of 15 reps of each exercise and then introduce a new exercise starting with 1 set of 10 and progress as stated above. We have listed reps and sets for each exercise on their specific pages below.
NO! 🙂
Keep up with the exercises 1-2 times per week when you can. Use it or lose really does exist! In fact, mild reversibility has been shown to occur 2-3 weeks once you have stopped exercising so if you stop it is likely your old problems will re-occur – so keep up the good work!
Yep, you sure can! All these exercises can easily be done at the gym either with a band, cable, or free weights. The shoulder exercises such as the internal and external rotation exercises are great warm-up exercises:-)
No! You might be stronger on one side but always strive for balance so make sure you exercise each side equally.
Yes, you may be stronger on one side, usually your dominant side. If you feel you are then add in one extra set of each exercise on the weaker side until it “catches up”. Always strive for balance.